Prerequisites
Before creating dispatch rules, make sure you have:At least one agent
You need an active, configured agent to answer the phone.
At least one phone number
You must have a purchased or imported phone number available in your workspace.
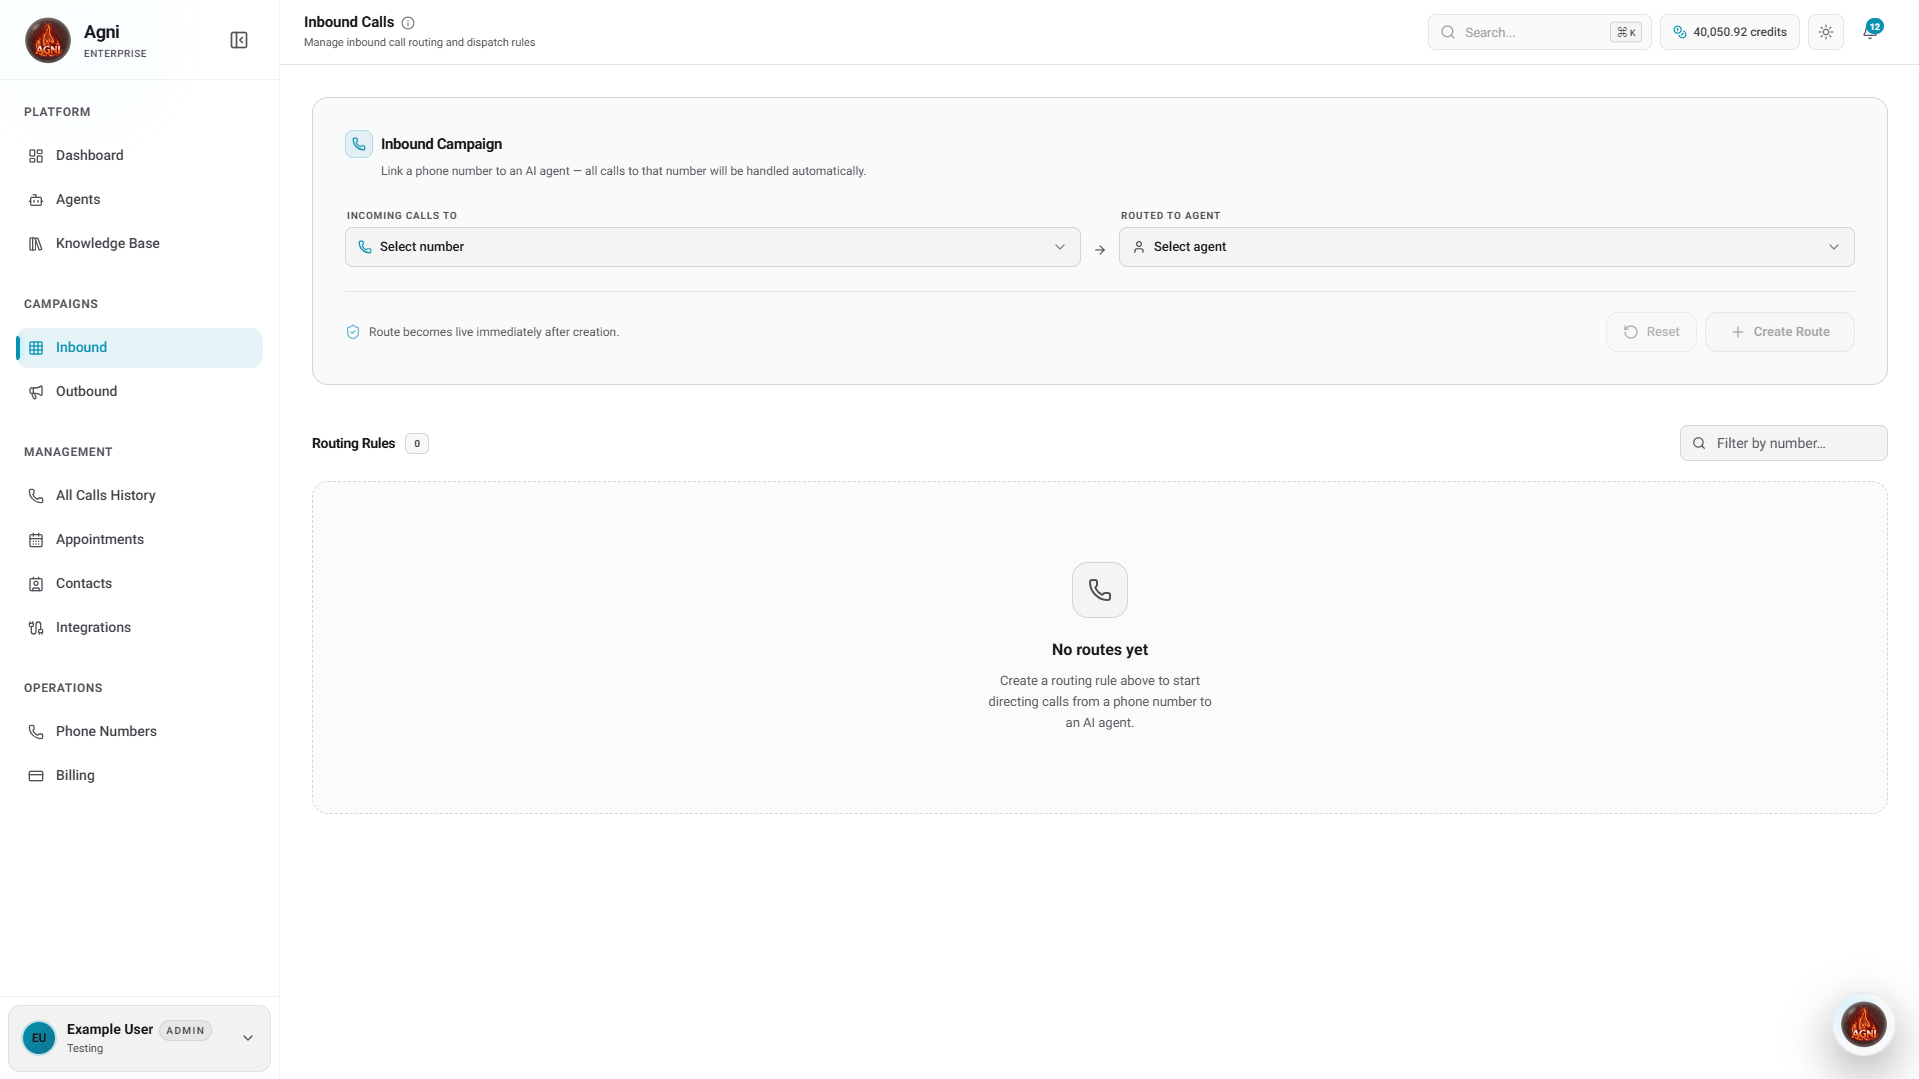
Create an Inbound Campaign
Setting up a new inbound campaign (dispatch rule) takes only a few clicks. Once configured, the route becomes live immediately after creation.Select Phone Number
Under Incoming Calls To, click the dropdown and select the phone number the public will dial. If you have no numbers yet, follow the buy one first link.
Route to Agent
Under Routed To Agent, click the dropdown and select the AI agent you want to handle the incoming calls.
Configure Schedule & Rules
Expand the Schedule & Rules section to control when and how inbound calls are handled:
| Setting | Description |
|---|---|
| Timezone | The timezone used to interpret all time-window settings. |
| Max Concurrent Calls | Maximum simultaneous live calls for this route (Range: 1–10). |
| Start Date | The date from which this inbound route starts accepting calls. |
| End Date | The date on which this route stops accepting calls. |
| Call Window Start / End | Restrict calls to a specific daily time range (e.g., 09:00–18:00). Leave blank to allow calls at any time. |
| Active Days | Toggle individual days of the week (Mon–Sun) on which the route is active. |
Inbound Route Detail View
Once a dispatch rule is created, it will appear in your Inbound Call Rules list. Clicking on a specific active rule opens the detailed Route Dashboard. This gives you a comprehensive overview of how that specific number is performing.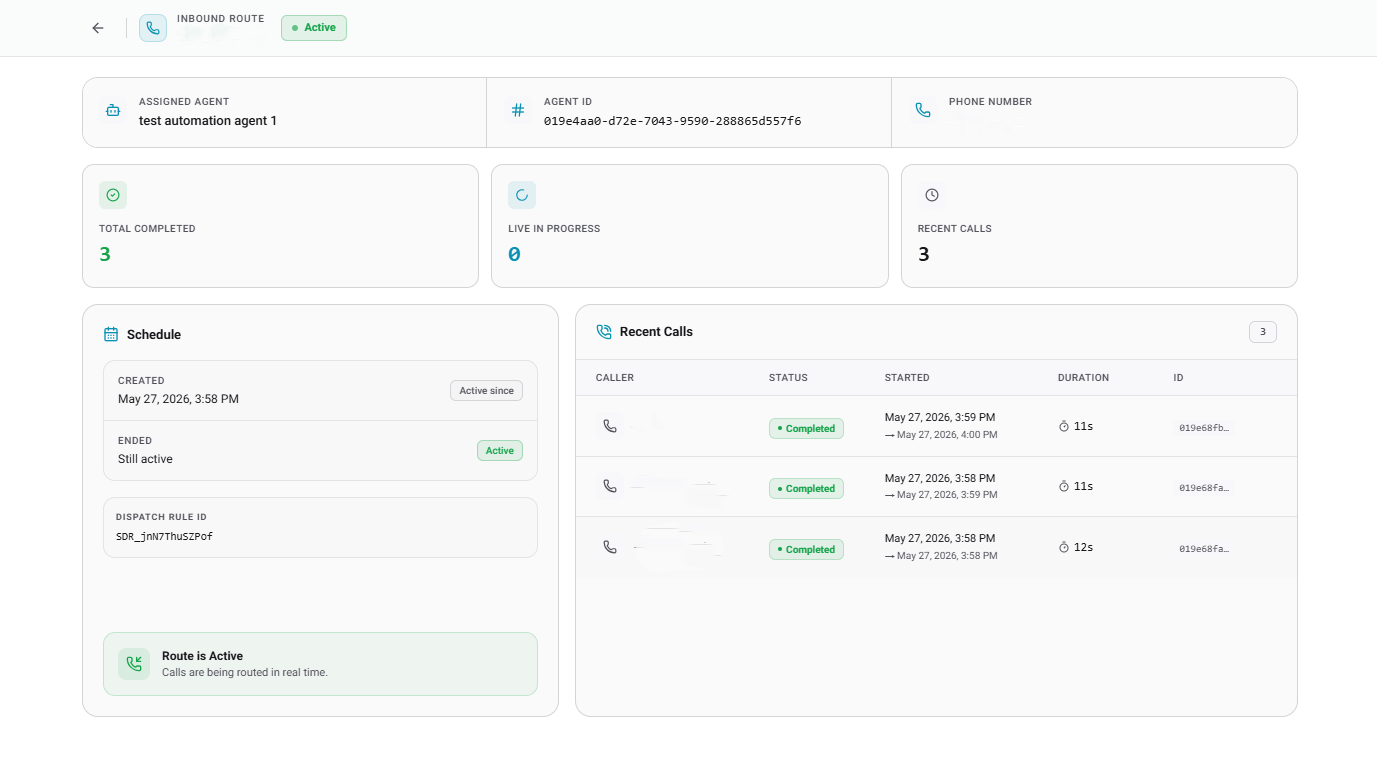
- Identity & Routing: Quickly verify the Assigned Agent, the specific Agent ID, and the designated Phone Number.
- Performance Metrics: Monitor volume at a glance with counters for Total Completed calls, calls currently Live In Progress, and the total number of Recent Calls.
- Schedule & Status: The Schedule block confirms when the route was Created, when it ended (or if it is Still active), and provides the unique Dispatch Rule ID.
- Recent Calls Log: A dedicated table at the bottom of the page displays a live feed of all the calls that have recently come through this specific inbound route.
Common Routing Patterns
One agent, one number
One agent, one number
The simplest setup. Buy a number, assign it to an agent, and you’re live. Ideal for a single product line or department.
Multiple numbers, different agents
Multiple numbers, different agents
Buy separate numbers for sales, support, and billing. Create a dispatch rule for each, routing to specialized agents with different prompts and tools.
Business-hours only routing
Business-hours only routing
Use the Call Window Start/End and Active Days settings to restrict when your agent answers calls. For example, set window 09:00–18:00 on Mon–Fri to only route calls during business hours.
Campaign-specific numbers
Campaign-specific numbers
Use unique phone numbers for different marketing campaigns or ad channels. Route each to the same agent but use dynamic variables to track which campaign the caller came from.
API Reference
To manage phone numbers and agents programmatically, refer to the following API endpoints:Telephony API
List, buy, and manage the phone numbers available for routing.
Agent API
Retrieve the list of your configured AI agents to use in dispatch rules.