Organization & Profile
Manage the core identity of your workspace and your personal account details.Organization
Organization
The Organization tab allows you to manage your top-level workspace settings.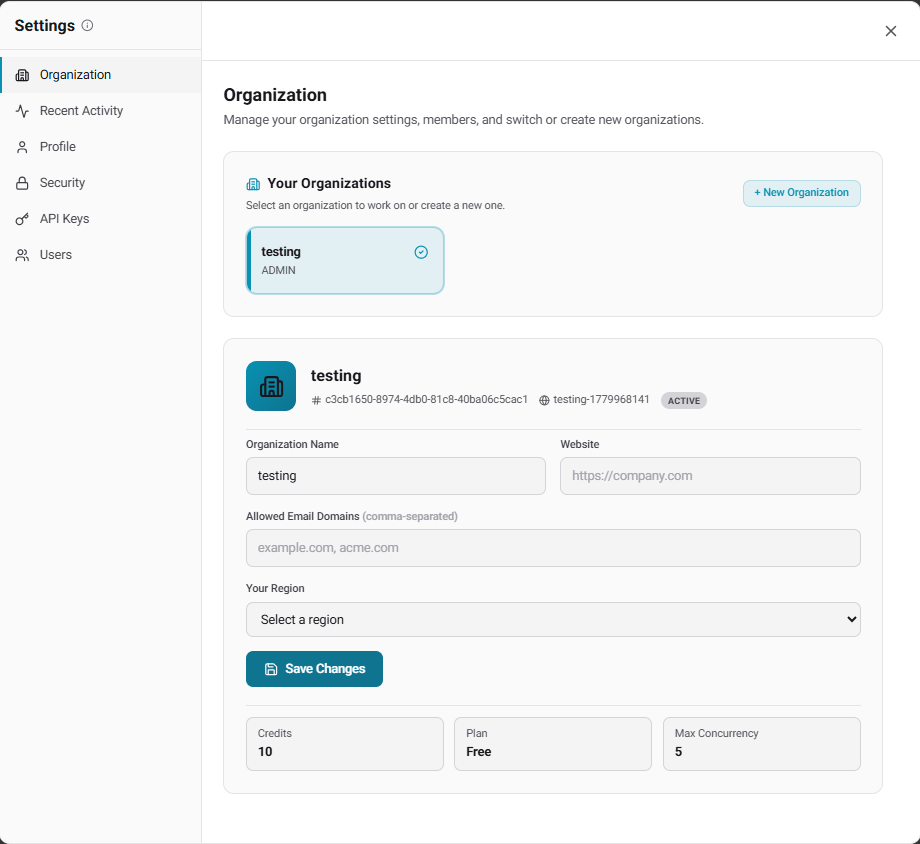
- View your active Organization ID and current plan (you’ll need the org ID for some API calls).
- Update your Organization Name and Website.
- Restrict access by defining Allowed Email Domains (comma-separated). Only users with matching email domains can be invited to your workspace.
- Set your default Region for data residency and latency optimization.
Profile
Profile
The Profile tab displays your current role (e.g., ADMIN) and registered email address. You can update your First Name and Last Name here.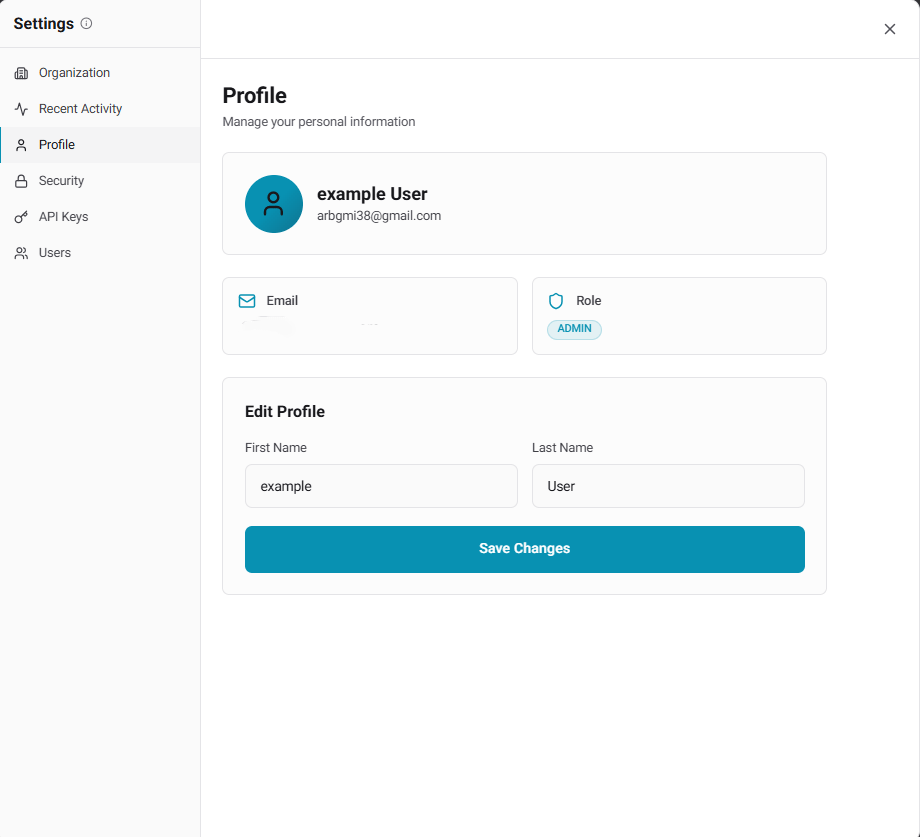
Security & Access
Secure your account and manage programmatic access to your voice infrastructure.Security
Security
Protect your account from unauthorized access:
- Change Password: Update your current login credentials.
- Two-Factor Authentication (2FA): Add an extra layer of security to your account. Highly recommended for production workspaces.
- Active Sessions: Review all devices currently logged into your account. Use the Revoke button to instantly disconnect unrecognized or old sessions.
API Keys
API Keys
Generate and manage the secret keys required to interact with the Agni REST API.Click + New Key to generate a token. The key is displayed once — copy it immediately and store it securely.
X-Api-Key header:Team Management
Agni allows you to collaborate securely by inviting team members directly to your workspace.Manage Users
The Users tab displays a complete directory of everyone with access to your organization, along with their assigned roles and permissions.
Invite Team Members
Navigate to the Invite User tab. Enter their Email, First Name, and Last Name, then click Send Invitation.
Invited users will receive an email containing a temporary password. They will be required to change this password upon their first successful login.
API Reference
Once you have generated your API Keys or connected your integrations, you can begin automating your workflow.API Reference
Full REST API documentation with cURL, Python, and JavaScript examples.
GHL Integration API
Manage your GoHighLevel connections and appointments programmatically.
Cal.com Integration API
Manage your Cal.com connections and event types programmatically.